Guitars and bass guitars have two parts that are very difficult to make in the home. The neck and the body. With some decent tools, you can work on a body. But once you’ve got them, adding the other bits is relatively simple, although if there’s a hard way to do something, I’ll inevitably find it!

Harley Benton Jazz Bass
One of the things you’ll find if you seek advice on the net, is that all the people who post videos are Americans with huge garages and workshops, things that I don’t have and never will. But we have a little porch and front garden, and I had to make use of them.
What prompted my little project was that I had a cheapo bass, “Harley Benton” branded, from Thomann, which I bought when I was invited to join the band “Collibosher”. I hadn’t played for a few years, and had no idea where I’d left my last set of gear. It sounded rather pathetic, until I changed the strings for some Rotosounds. Amazing what a £20 upgrade can do! Before we actually got our first gig, I had bought a better bass, and I kept this cheap one as a spare, though occasionally I did use it for the odd number where its character with the Rotosounds suited, until I added some electronics to my main bass which enabled me to get the sound on that.
It always came to gigs with me (just in case) and got stored with the other one, but for some reason, the neck got warped. And the Truss-rod was not for turning! So basically, I’d have struggled with it, had I had to use it.
Last year, they were selling replacement necks on Amazon and E-bay, for not a lot, around £30. I thought I’d give it a go even though these necks had an extra fret, so I knew I’d have to move the saddle a little. But that didn’t really bother me.
Re-work the old bass body
Once I got the new neck, I realised that I would have to widen the part of the body where it fits. I had other thoughts going round my head. One was, that I had always wondered why so many top bassists preferred the P-bass over the Jazz. So I was going to somehow put a P-type neck pickup in place of the existing one. I got a cheap one! And I also decided that I wanted something different, do away with the pickguard, and make something that was unique. I ordered a few bits and pieces including a Fender Telecaster type control panel, a replacement saddle (as the back of the original was rusty), a couple of sheets of thin plywood, a Tele/Strat switch and a no-name Chinese active circuit. Switches, knobs, etc. Oh, and sandpaper, primer, paints and gloss. There was a major job on the way!
Measuring and locating where things will go
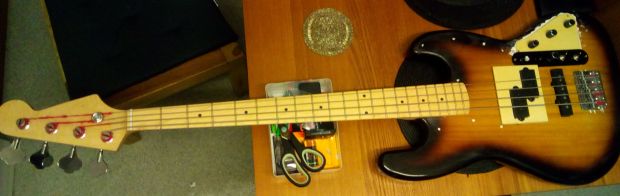
Here, I’ve widened the space for the neck, screwed it on temporarily, strung it, so I can mark out where the P-bass pickup will go. I’d used elastic bands before putting the strings and saddle on, to get the saddle in the right place. I filled in the holes where the screws had gone. I dug out space for the Telecaster plate and control panel that I had made of plywood, and inlaid it (which will be shown in the next picture).

Here you can see the dig out for the control panels, and other bits!
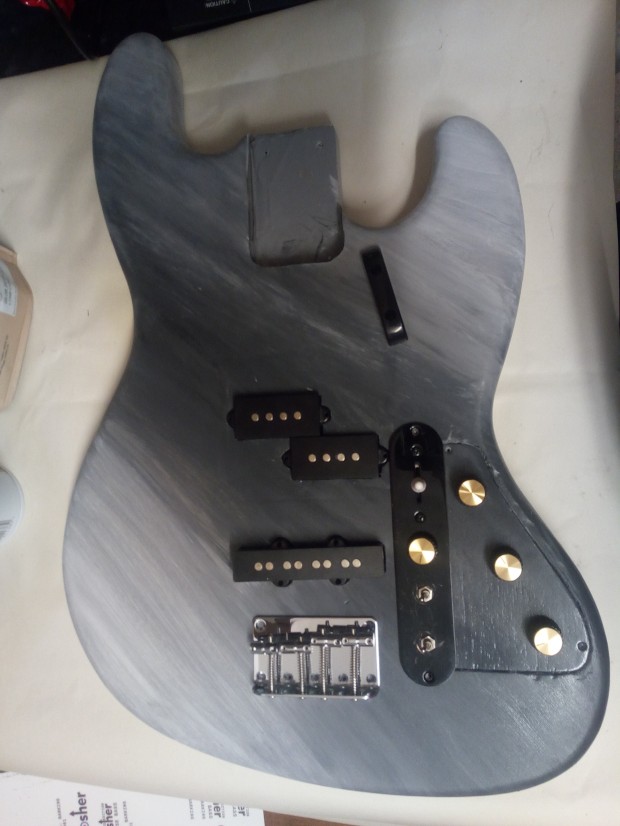
After digging space for the P-type pickup, I lined the area with Copper tape, and inlaid the plywood shroud I’d made for it (that was about the 4th attempt). I screwed it down only while the glue was drying then filled in the holes and the gap around the edge. On the right, you can see where I marked out and made holes for the saddle’s new location, and also where I drilled a hole so I could send an earth wire to the back of the saddle. There was a very thin hole originally, but no actual connection! At the top you can also see where I dug out the cavity for the control panels, and where the battery holder can be put in the other side.
You can also see an oval plate, a saucepan lid, a kettle, a travelcard holder, a bradawl, and my big toe!
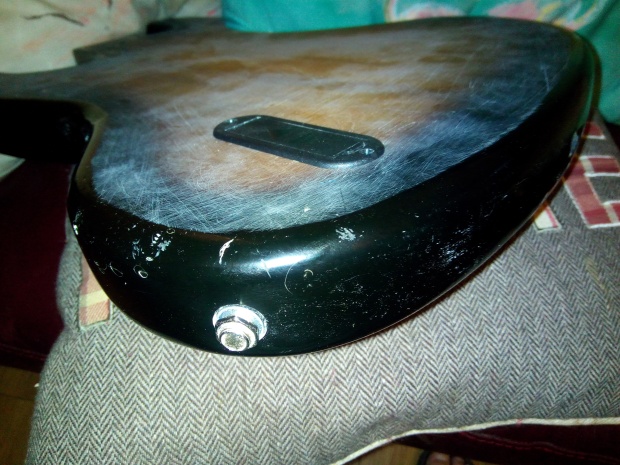
Rear of bass showing rubbing down for primer, and battery holder in place
Big Mistake to use Wood Filler
Once I had completed the filling around the pickup shroud, it was time to prepare for painting! So, I had to sand the veneer to make a key, and spray on the primer, and this is where I discovered that I’d made a big mistake. The Acrylic primer, or its propellant, dissolved some of the wood filler! So you can see a number of dips and dimples on the finished guitar. I read that car body filler is the way to go. If there’s a next time ….
The shit-brown Sunburst has gone! Yay!
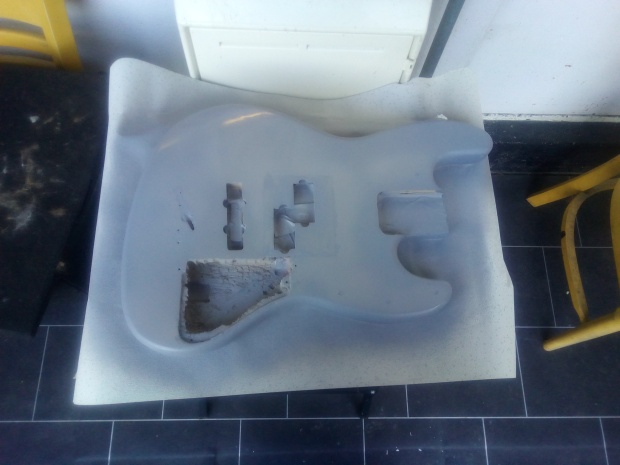
Here’s a shot of the body after spraying on grey primer. I did a few coats! The next job was the painting, and my partner Sandra had asked to do this. We got some sponge paintbrushes, and tubes of black and white acrylic paint. The original idea was to create a fade diagonally across the body from black to white. Then from white to black to white again. But as she was attempting this, something better happened, and we got a marble effect. So I asked her to just continue what she was doing, and the result was brilliant!! And here it is:
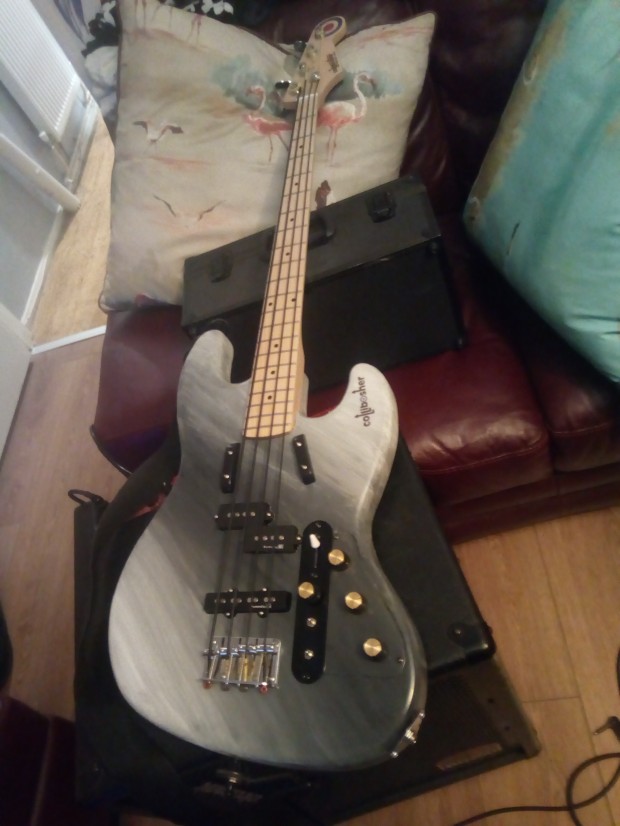
The Marble Paint job and furniture put in place.
I really couldn’t have hoped for better. By the way, I’d seen an offer on line for some Marshall Amp type knobs going cheap, 4 left, so I sent for them. I don’t care that they’re made to go on a guitar amplifier! They might be cheap plastic, but they look great!
Decals
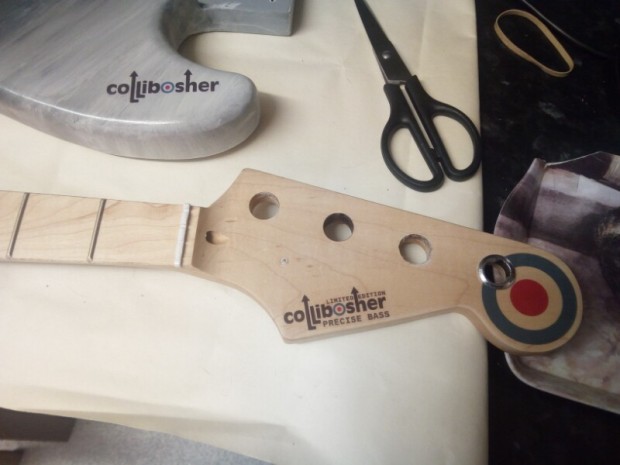
Before spraying on the varnish, I had to put some logos on. If we’re going to create our own masterpiece, then it needs to be branded. I had ordered some printer decal paper in readiness for this moment. They need to be printed, sprayed with varnish twice, then left to dry for 2-3 days (otherwise the ink will come off in the water). You cut the design out from the sheet, drop the sheet into something like a soup dish with water, it will curl up, sink, and straighten out, in about 20 seconds, at which point you slide the backing off a little bit, place the other end where it’s going, and slide away the rest of the backing. I added our “collibosher” logo on a lighter part of the body, another logo with the words “LIMITED EDITION” above and “PRECISE BASS” as seen below, and a Mod/RAF roundel at the top of the headstock. On the reverse of the headstock (not shown) I added “Nº 001 of 001” just for a laugh. I had to cover up the main neck tightly and spray some varnish over the logos on the headstock to protect them.
Next thing was to spray the body with the varnish, several small coats, over the course of a week. I wanted it to be protected against knocks, and look nice and shiny.
Once this was all done, I lined the inside of the control cavity with copper tape, and covered it with insulating tape. I lined the inside of the cover with copper tape. I made a few points so that the earth parts would touch each other when the cover and control panel were screwed into place.
Problems…
I connected it all up, and hit the first problem. For whatever reason, the wires on the potentiometers from the body of the no-name preamp, kept breaking. I had to resolder all 9 of them, but at least they didn’t go all at once, so I could refit them in the right places. And then, the tone controls didn’t work! I could tell when I had it in active or passive mode, due to a change in sound, but the tone was not adjustable. Another thing I had tried was to try to mix the bridge pickup directly, and through a series resistor, to get a different blend with the neck pickup, but it wasn’t all that interesting!
One thing was obvious though. The feel of the bass was excellent, action was good, it played nice. Given its cheap origins, I didn’t want to put really expensive pickups on it, but I sent off for a PJ set of pickups branded “Powered by LACE”. These are made in Korea, to the spec of LACE pickups, at a fraction of the price. The quality isn’t as great, but as it happened they did turn out to be a great improvement on the no-name ones.
Better Pickup Wiring
I sent off for another preamp, an Artec SE3. The reason I hadn’t gone for one of these first time, is that I didn’t think you could bypass it, but I’d worked out that you can. And this time, I wired the Pickups so that the Neck pickup went direct to position 1 on the switch, out of phase to position 5. You can’t tell the difference except when mixed with the bridge pickup which went to position 3. I get two totally different “mixes” at positions 2 and 4. Coming out of the mixing switch, the signal goes through a preset variable resistor of 250k, which can be switched out, then into a standard 250k pot for the volume control. This gives me a nice way to switch between two volumes quickly.
From there, it’s wired to another switch which enables me to bypass the active circuit. Not only will this give me an alternate sound, but if a battery runs out mid-performance, it will give me sound!!
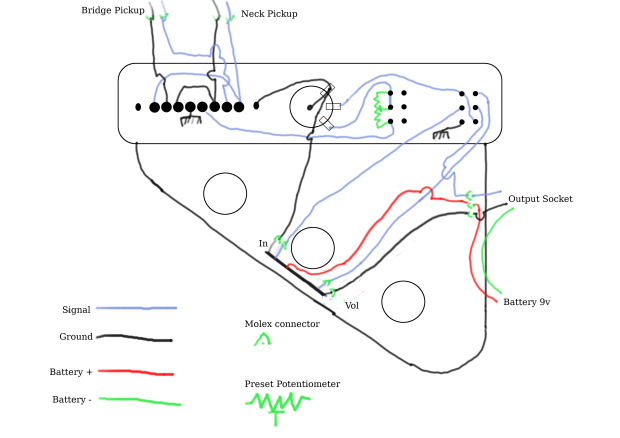
How I wired the circuit. The thicker black line is the circuit board which is wired directly to the three tone controls, Bass, Middle and Treble.
I was disappointed at the level of humming on the Bridge pickup, so I took the pickup out, lined the cover all but the holes for the magnets with copper tape, with a spur of tape out of the side into the main control area where it joins to the copper lining there. The hum was still there, but less intrusive and it’s a common problem on most single-coil pickups. There’s another hum when I put it into passive mode. That’s because the active electronics cancel out the effects of the lead’s internal capacitance, which makes it susceptible to picking up hum. But that mode would only be used in emergency in case of a flat battery.
Pleased so far
When I first wrote this, I had only tested everything at home. When I moved to my partner’s place, I brought with me my stereo, which was built around a Pioneer A209R amplifier. As soon as I set it up here, it hummed, loudly. I assumed it had been knocked in transit and something might have come loose. I’ve already written about the Cambridge Audio One unit I bought to replace it (which runs hum-free here). A neighbour took the Pioneer off our hands, and got back to us and said there was no hum at all in her flat. So your guess is a good as mine, but there’s obviously some RF interference and/or unclean mains here, so I am hoping that when we get the bass to the rehearsal rooms, and to a proper gig, it might not be a problem. Even here, I’ve got it down to manageable levels I think, so fingers crossed.
However, when I took the bass to our rehearsal, on 8th April, using the same amp and lead, the Bridge pickup noise totally disappeared when in active mode. So you could say that I am pleased with the outcome.
My very own Bass Guitar
So, what does it sound like? Very nice. Using the Neck pickup in active mode, there is no hum at all, and that’s its main playing mode. It’s got a nice beefy sound, and I can see why the single pickup P-bass has such wide appeal. I can get a more twangy sound with the bridge pickup, and mixing the two pickups, in phase, and out of phase, give two more, different and very usable sounds. You can hear the sounds on the video below, bearing in mind that it was recorded on a mobile phone, but you can still hear how different the four sounds are.
The band got together on April 8th to rehearse, and it was great to give my new toy a run-out. It played well, and sounded good.
